Close Menu

    Subscribe to Updates

    Get the latest creative news from FooBar about art, design and business.

    What's Hot

    The Limits of AI Quantization

    December 24, 2024

    Elon Musk’s xAI Raises $6 Billion to Propel AI Innovations

    December 24, 2024

    Google Proposes Unbundling Android Apps to Address Antitrust Concerns

    December 24, 2024
    Facebook X (Twitter) Instagram
    Tech News Mart
    • News
    • Gadgets
    • How to
    • AI
    • Reviews
    • Gaming
    • Throwback
    Facebook Instagram YouTube
    Tech News Mart
    Home » How to create a hanging indent using Google Docs

    How to create a hanging indent using Google Docs

    akshay rahalkarBy akshay rahalkarJuly 3, 2023Updated:July 4, 2023No Comments1 Min Read How to
    Share
    Facebook Twitter LinkedIn Pinterest Email

    Google Docs is a versatile word processing tool that offers a wide range of formatting options to help you create professional-looking documents. One commonly used formatting technique is the hanging indent, which is particularly useful for creating bibliographies, reference lists, or any content that requires proper indentation. In this blog, we will guide you through the simple steps to create a hanging indent in Google Docs, allowing you to polish your documents and present information in a structured and organized manner.

    Step-by-Step Guide:

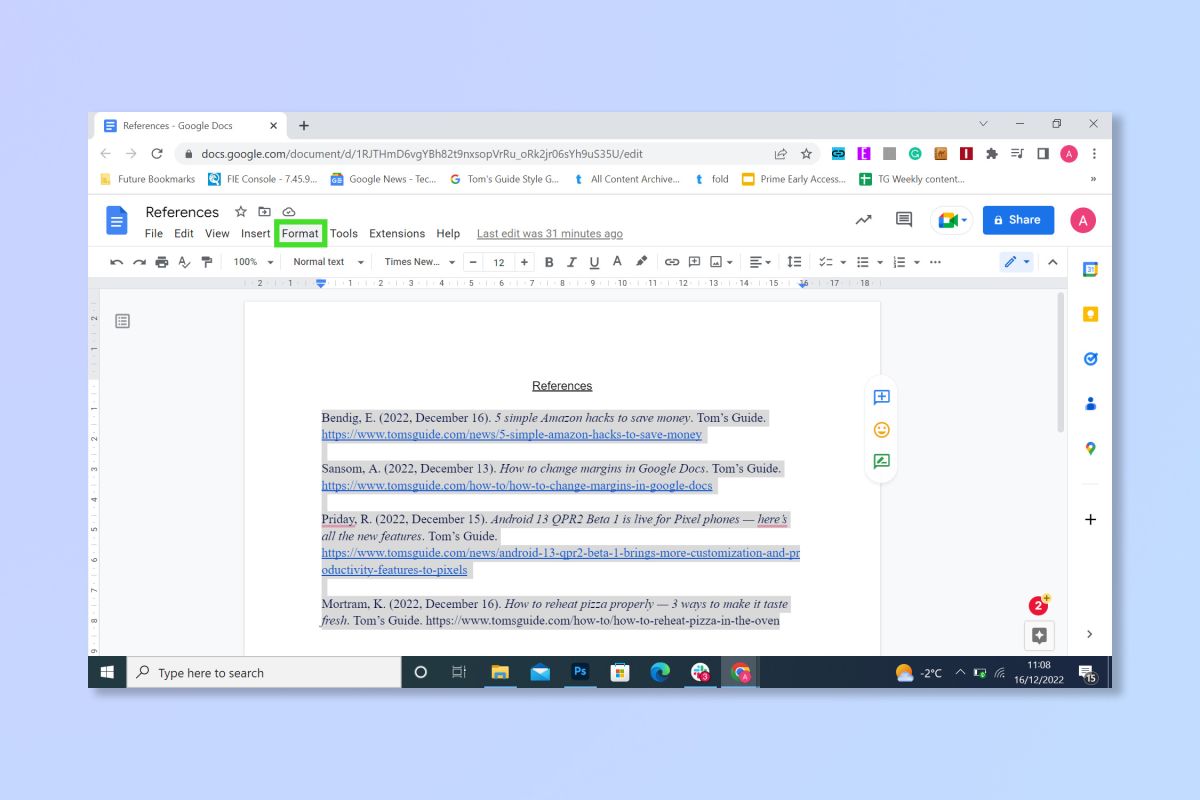
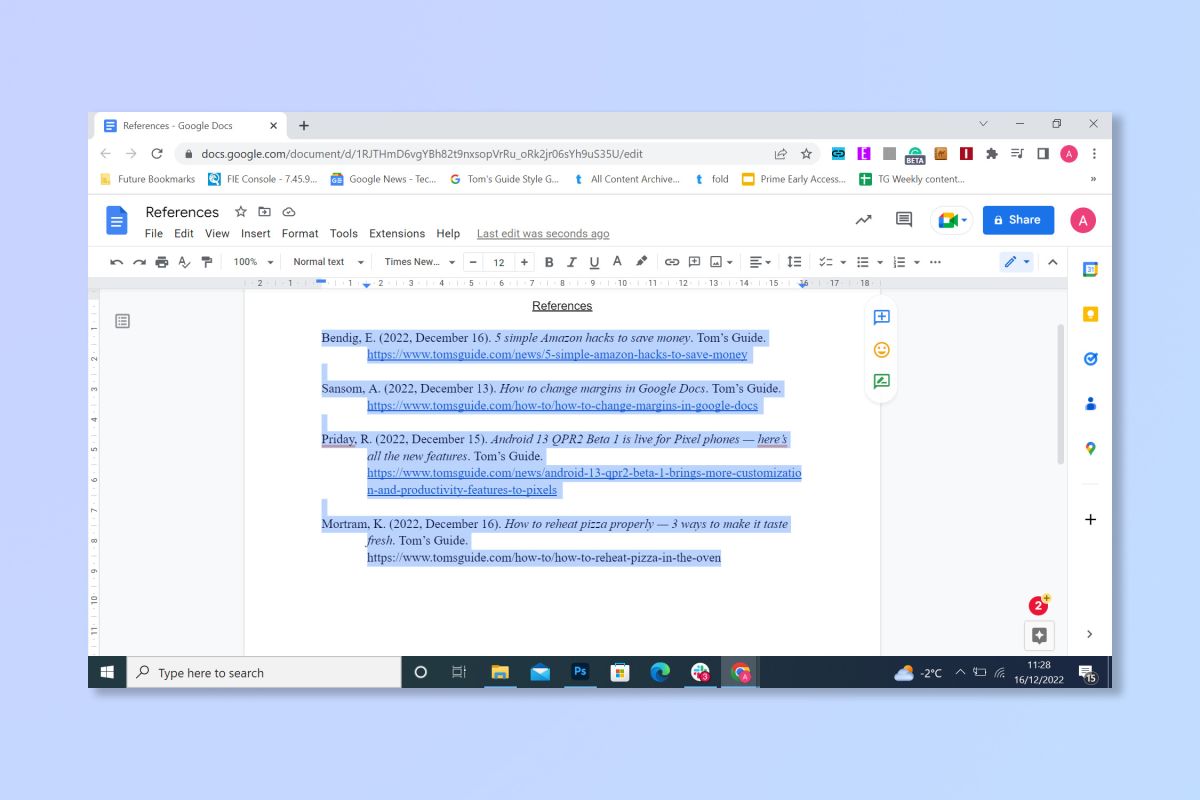
    1. In your Google Doc, highlight textyou wish to apply indents to and select Format.
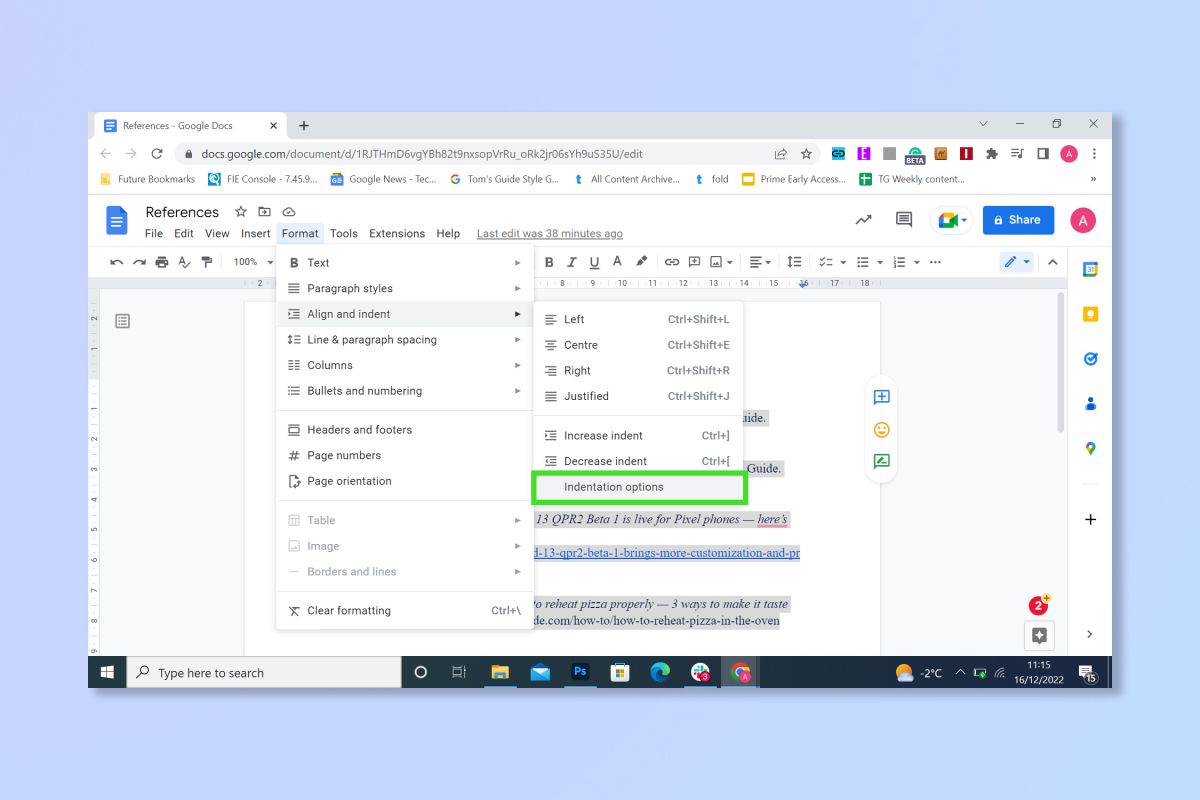
    2. Click Align & indent and then select Indentation options.
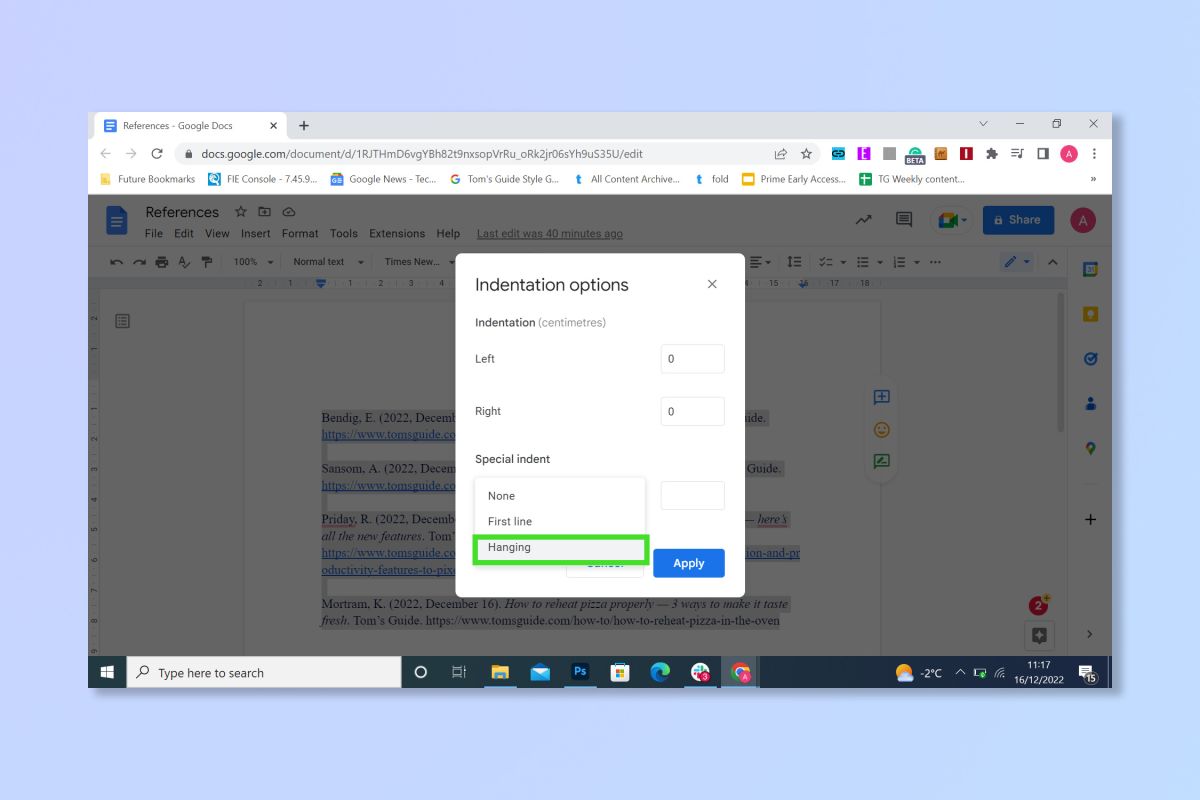
    3. Select Hanging from the drop-down Special indent drop down menu.
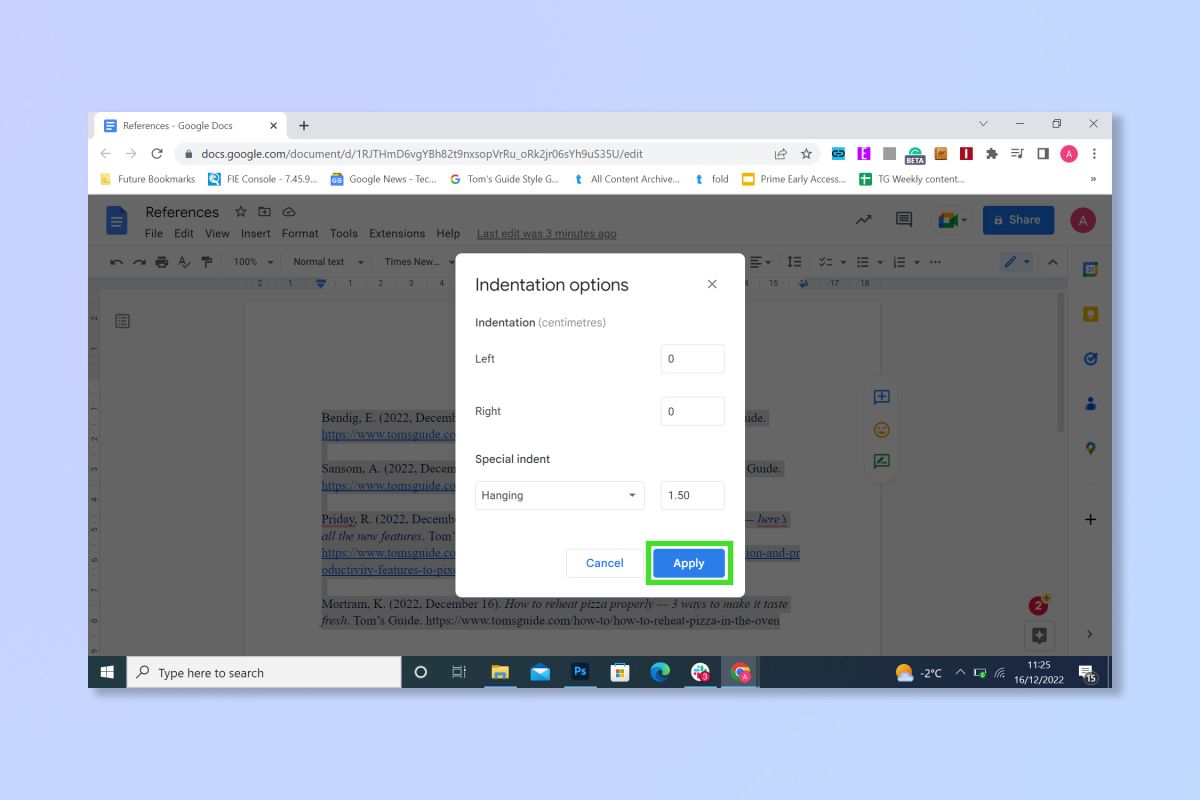
    4. Enter a value into the box on the right to set how large you wish the indent to be in centimeters.
    5. Click Apply.

    Your text should now be indented correctly. 

    Easy peasy. If this is for an academic piece, remember that most universities and educational establishments have slight differences in the formatting they require, so check what they expect before submitting — and remember to proofread your work!

    Related Posts

    How to Use NameDrop in iOS 17

    September 27, 2023

    How to Take a Screenshot on an Apple Watch

    September 15, 2023

    WhatsApp Now Lets You Create Groups Without Naming Them

    August 24, 2023
    Leave A Reply Cancel Reply

    Categories
    • AI
    • Gadgets
    • Gaming
    • General
    • How to
    • News
    • Reviews
    • Throwback
    • What If
    Archives
    • December 2024
    • November 2024
    • October 2024
    • September 2024
    • October 2023
    • September 2023
    • August 2023
    • July 2023
    • June 2023
    • April 2023
    • March 2021
    Contact Us

    [email protected]

    Facebook X (Twitter) Instagram Telegram
    Categories
    • AI
    • Gadgets
    • Gaming
    • General
    • How to
    • News
    • Reviews
    • Throwback
    • What If

    Type above and press Enter to search. Press Esc to cancel.

    Go to mobile version