


Learn how to replace Siri with OpenAI and add ChatGTP-like features to your iPhone.
Step 1: Create Your OpenAI Account
To start, sign up for a free OpenAI account .
Step 2: Get Your OpenAI API Key
Next, log into your OpenAI account, click on Personal in the top right corner and click on View API keys.

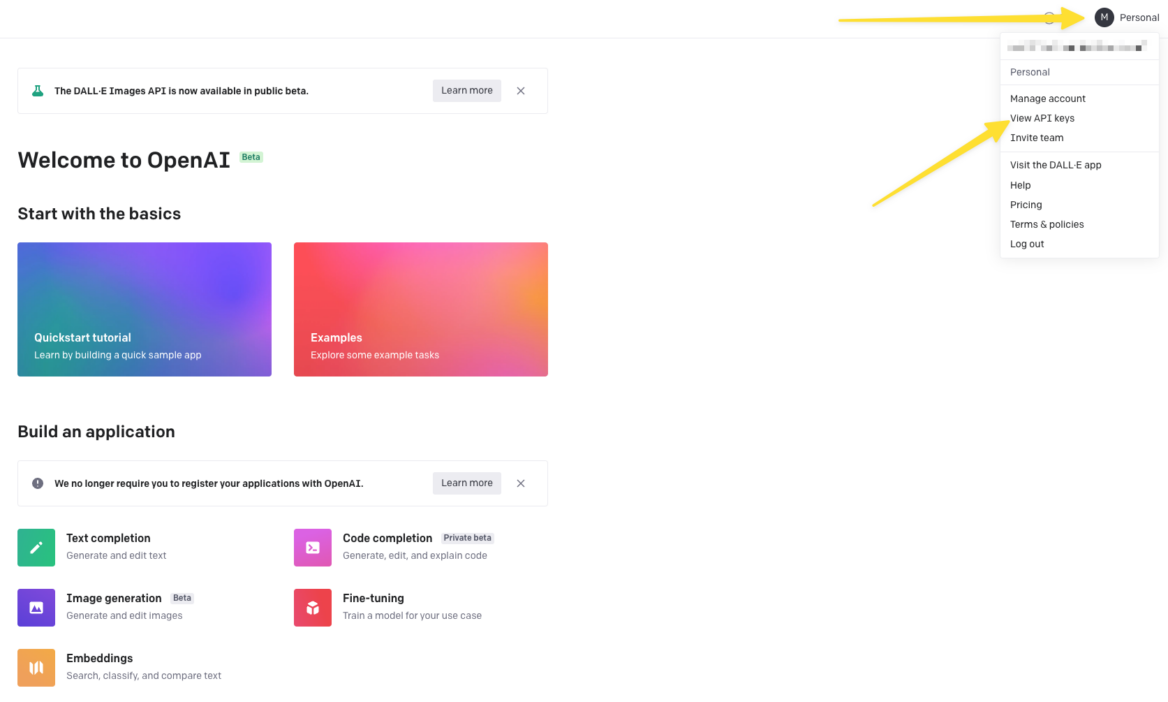
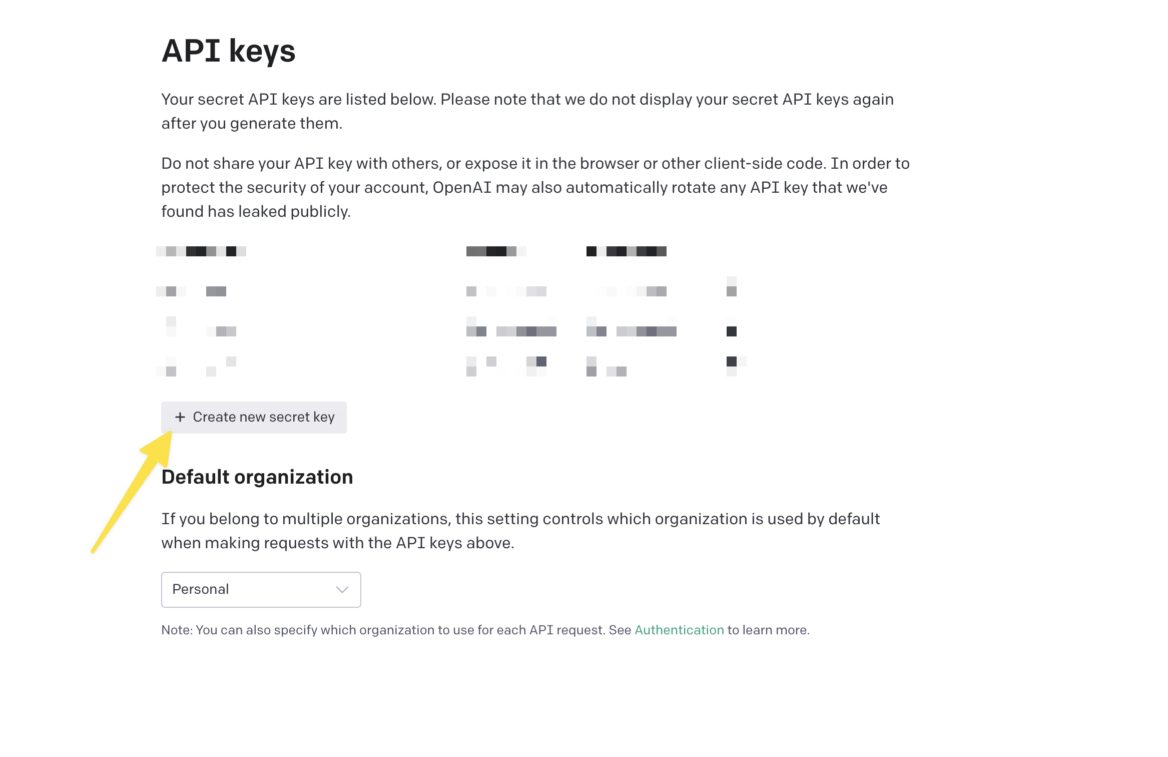
Click on Create new secret key and copy the API key shown in the popup. Save the API key in a secure location – you’ll need it in the next step to set up the shortcut.
You won’t be able to see your API key again after closing the popup, so make sure you save it carefully. You’ll need to generate a new key if you forget it or lose it.
Keep your API key secret and don’t share it publicly

Step 3: Add a new Shortcut
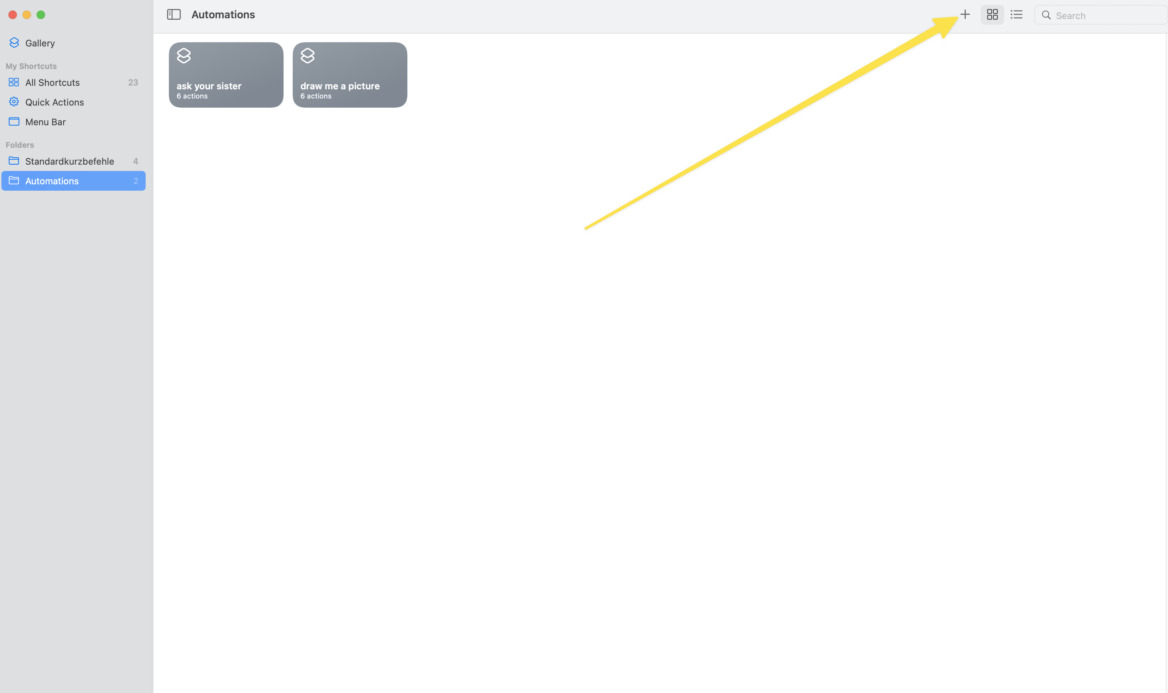
Next, open the Shortcut app on your iPhone, iPad or Mac. Click on the + icon in the top right corner to create a new shortcut.

Give your new shortcut a distinctive name. This name is also the command that you’ll use to trigger the shortcut when using Siri. In this example, the shortcut will be called “ask your sister”. That means, you can use the command “Hey Siri, ask your sister” to trigger the shortcut.


Step 4: Craft your OpenAI prompt
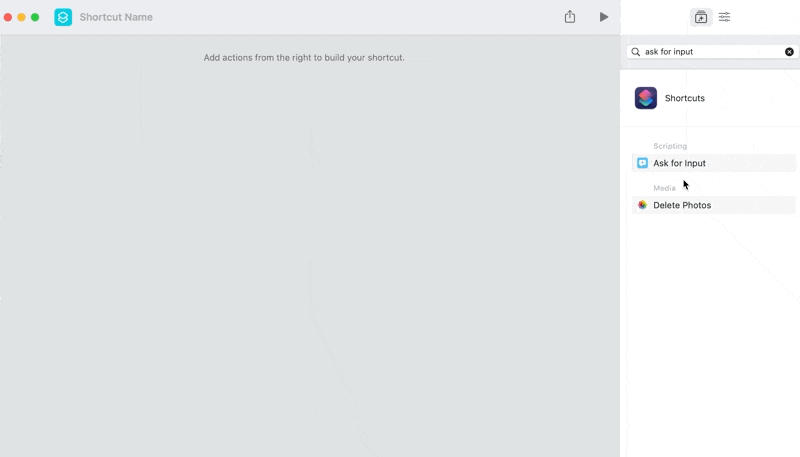
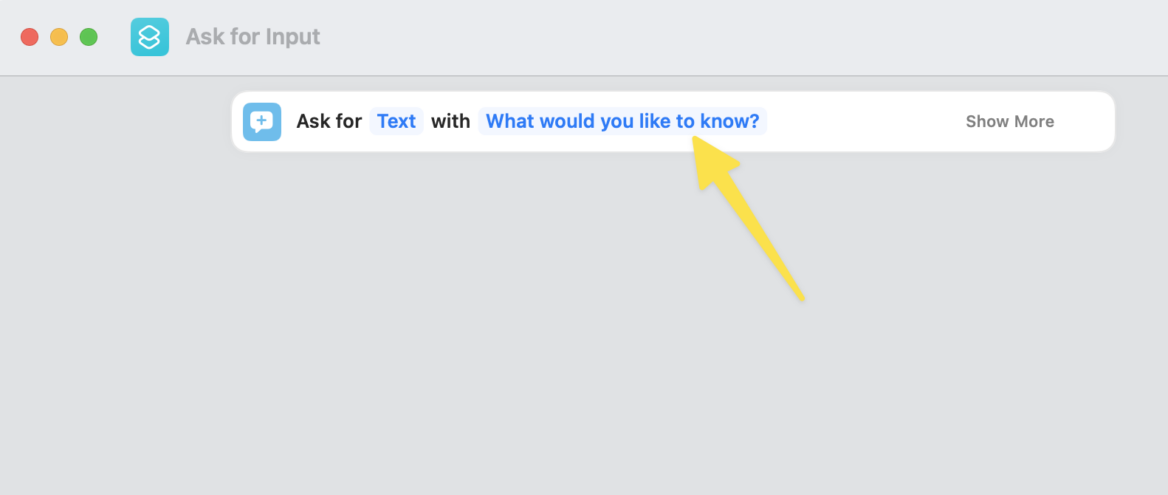
Next, add your first module to the shortcut. To do so, click into the search field on the right sidebar and search for ask for input.
Drag the Ask for Input module into the builder (on Mac) or simply tap it (on iPad or iPhone) to add it to your shortcut.

With this module, Siri will ask us for more details once the shortcut is triggered. We can define the question Siri asks us by typing into the prompt field.
Type a contextual question, like “What would you like to know?”

Now that you’ve gathered your actual question, it’s time to build a prompt around it.
Natural Language Processing Models like OpenAI require specific instructions (called a prompt) to return a good answer. The more context you provide for the model, the better the response.
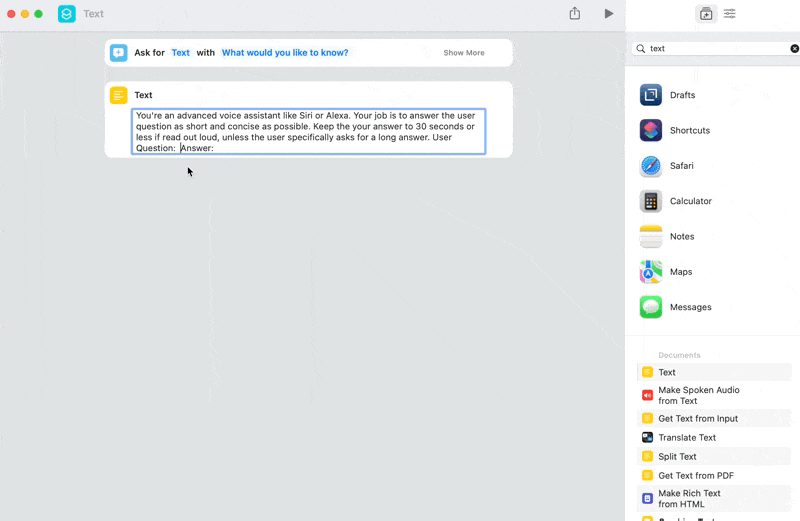
If you were to only use your question without further modification, you’d likely receive a fairly long answer (which is impractical when working with a Voice Assistant). That’s why you should add a Text module next to further specify your instructions.
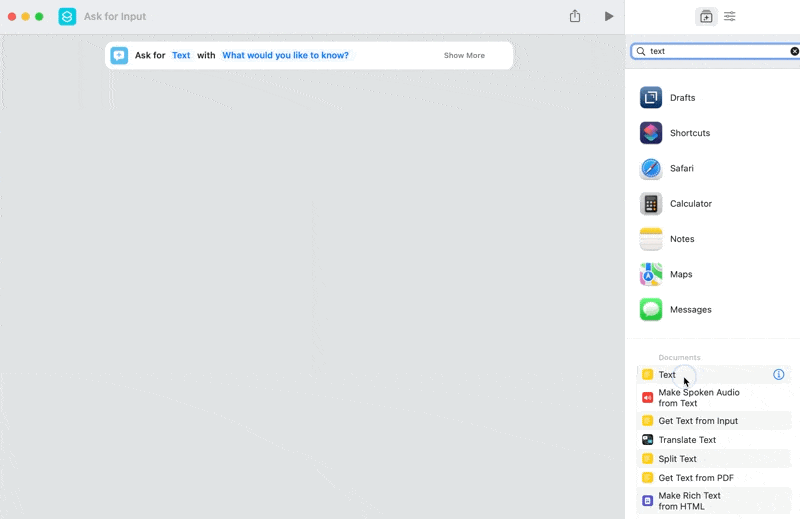
Search for text in the sidebar and drag the plain text module intro your shortcut (or tap it on mobile)

Now, write your specific instructions into the text module. You can play around with different prompts, but the example below is a great starting point.
Now it’s time to dynamically pull in your question from step 1 into the text module to complete the prompt. To do so, right click the text module after “User Question” and opt for Insert Variable. Then, select the Provided Input from the previous step.

On mobile, your keyboard should show a selection of available variables. Either go directly for Provided Input or tap on Select Variable to see all options.

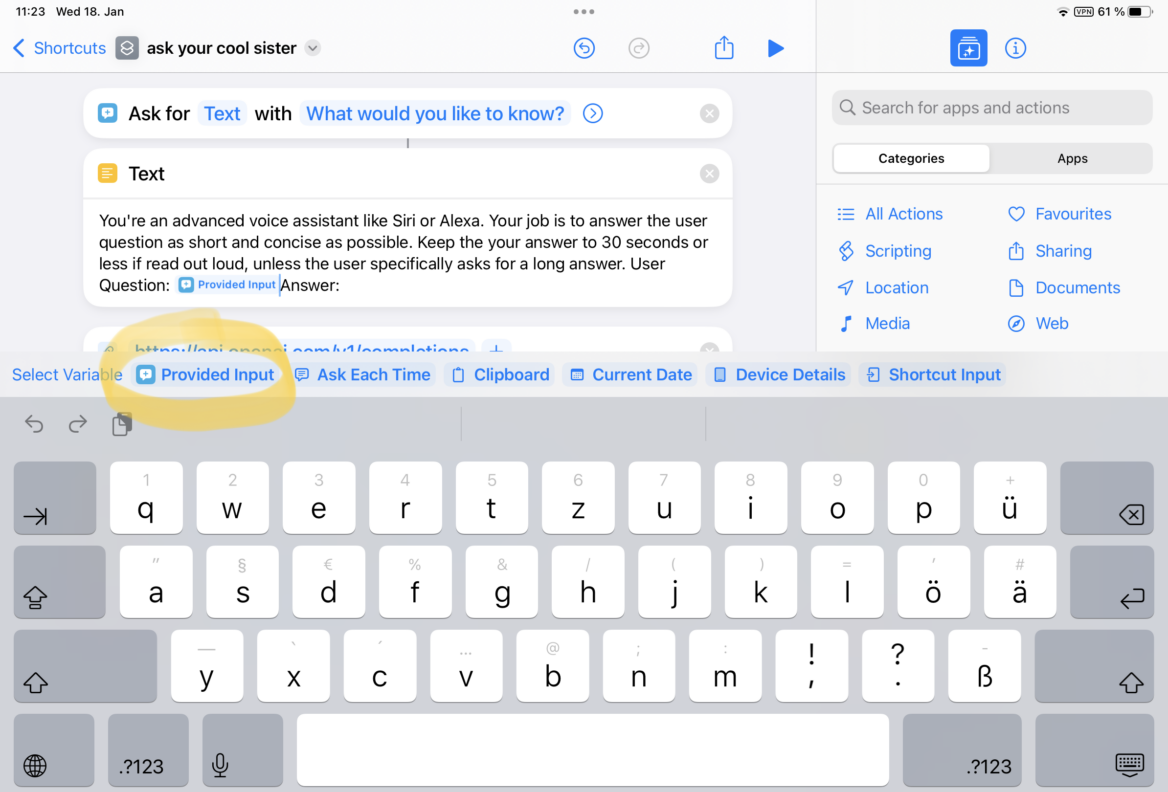
Last but not least, indicate to OpenAI that the prompt is finished by typing Answer: after the variable. With the crafted prompt, you’re ready to replace Siri with OpenAI.
Step 5: Use OpenAI as your personal assistant
Now it’s time to send your prompt to OpenAI.
Search for the get contents of URL module in the sidebar and add it to the shortcut.
Remove the Text variable that is added by default and then paste the OpenAI API URL
https://api.openai.com/v1/completions
Then, click on Show more to open the other settings of the module.


Change the method from Get to Post.
Open the Headers toggle, click on the + icon and type authorization into the key field. Then, switch to the Value field and write Bearer followed by a space and then paste your API key.
On Mobile, tap on the Add a new header option.
Make sure that Bearer is capitalised.

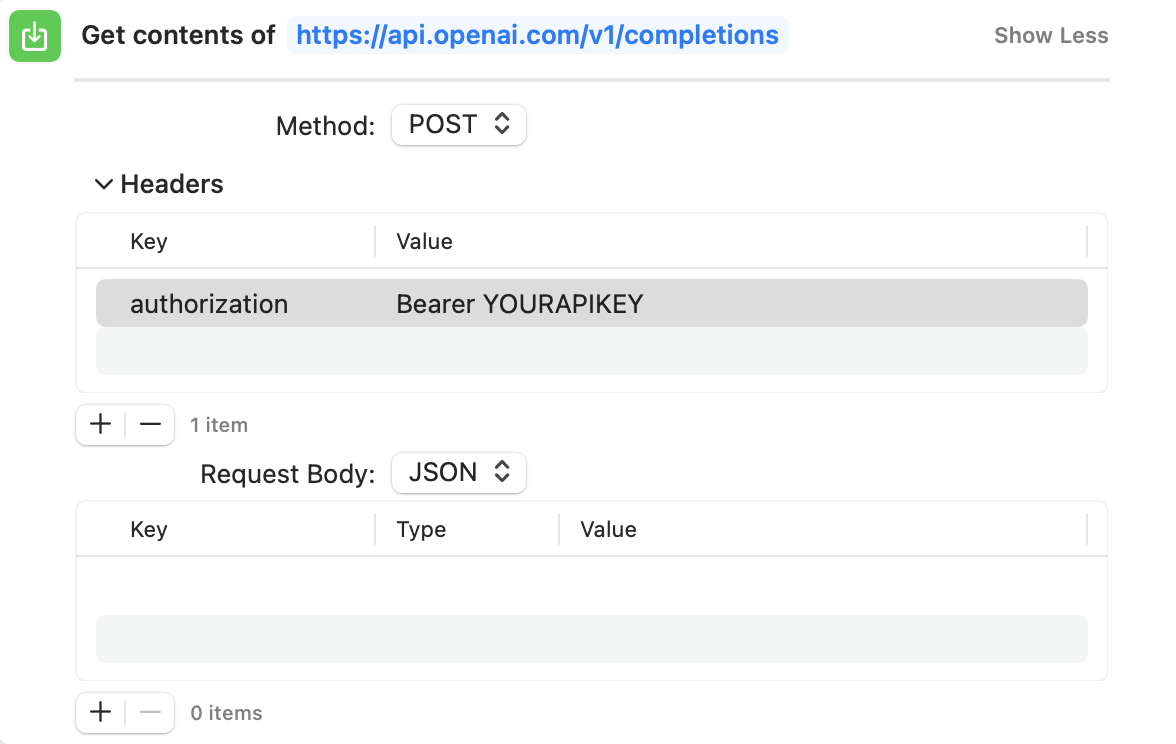
Then, click on the + icon below the Request Body table (or tap Add new field on mobile). You need to add a total of four different key value pairs here.
- model (text) – text-davinci-003
- prompt (text) – your prompt from above by adding another variable
- temperature (number) – 0.3
- max_tokens (number) – 300

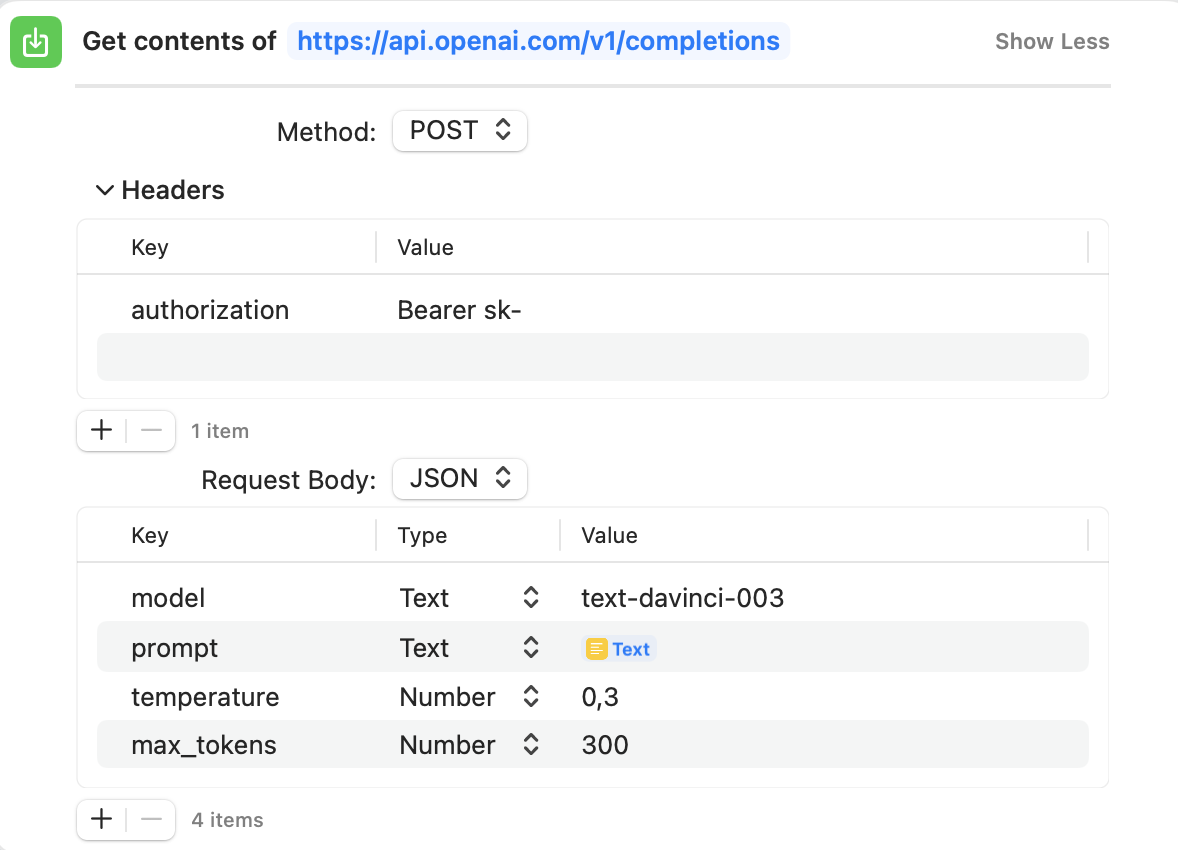
You can add the Text variable the same way that you added the Provided Input variable in the previous step.
On Desktop, right click and go for select variable.
On Mobile, the options should appear above your keyboard.
One last potential issue is the correct decimal separator. It will depend on your system settings whether you need to write 0.3 or 0,3. If you’re not sure, try 0.3 and if the test of the shortcut returns an error, switch to 0,3.
Here’s a quick explainer of the four settings that you just added:
- Model defines which Natural Language Processing Model should be used. OpenAI has a lot of different modules that vary in unique strengths and training data. Generally speaking, it’s best to use the latest model. As of publishing, that’s “text-davinci-003”, but you can check the official documentation to see whether something new is available.
- Prompt defines the instructions for OpenAI. We’ve built the prompt in the previous step, so we only need to pull it in here as a variable.
- Temperature defines the level of creativity that OpenAI uses when interpreting and answering your prompt. It’s a value between 0 and 1 with 1 introducing the most chaos and randomness. 0.3 or lower is a good value to get responses that are well-aligned with your question, but feel free to increase it if you’d like a personal assistant with a “free spirit”.
- Max Tokens sets the usage for your request. OpenAI runs on tokens (with one token being the equivalent of roughly 4 characters). You get $18 worth of tokens in the beginning, which should be enough for several hundred responses. After that, you need to start paying for OpenAI (though it’s still super affordable)
With everything set up until here, click on the play button in the top right corner to test your setup. It will prompt you to type in your question (later, you’ll be able to speak it instead) and then attempt to send it to OpenAI. If everything is set up correctly, you should see something like this:

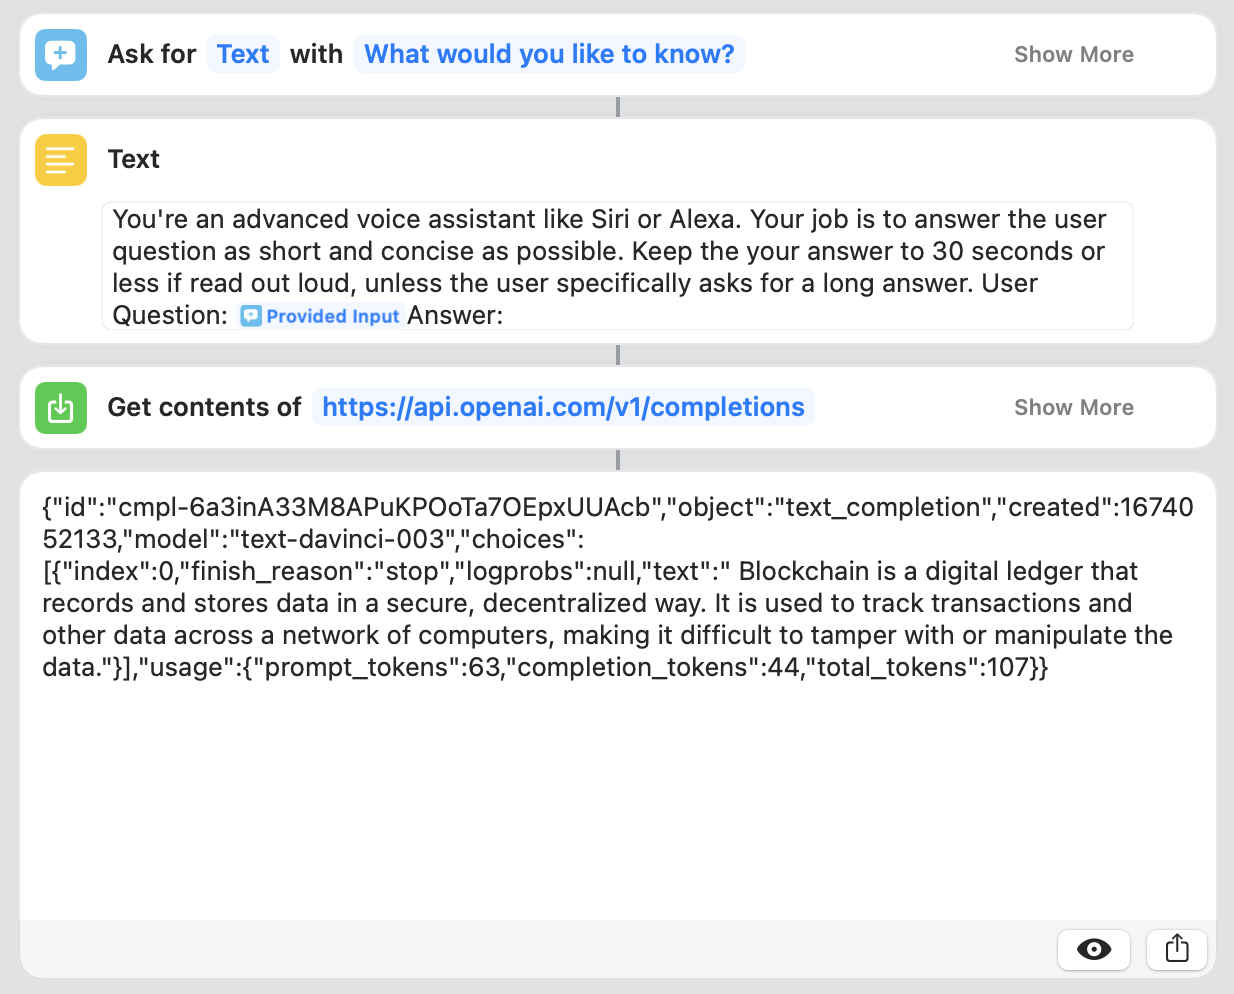
If something is wrong, you’ll still see a response but with an error message and a hint on how to fix it.
Step 6: Get the OpenAI response
Once your automation is set up correctly, it’s time to extract the actual response from the data set that OpenAI sends back.
If you look closely, you see that the answer comes after the key “text” which is nested inside “choices”.
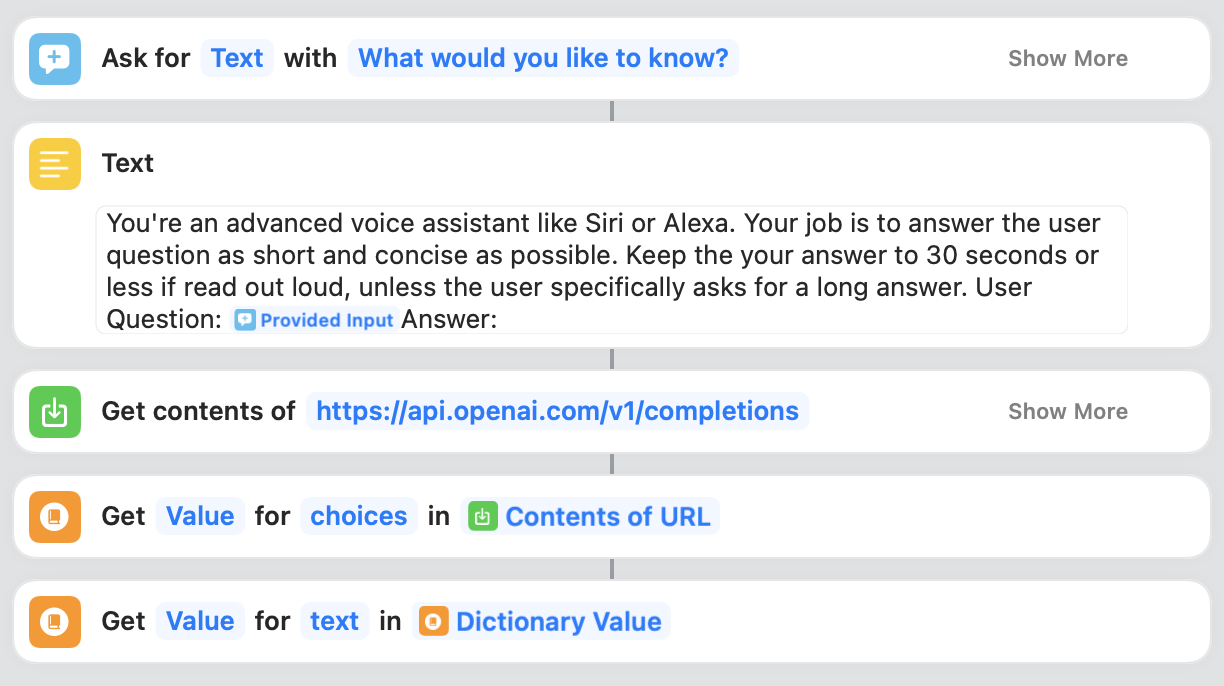
To get only the response, search for the Get Dictionary value module and add it to your shortcut.
Click into the empty “key” field and set it to ***choices. Then, add a second Get Dictionary value module and set the key to text.
Careful here. When typing text, Shortcuts will try to autocomplete and insert the same text variable that we used to store our prompt in earlier. Make sure to not go for that autocomplete. You want the word “text” inside the key value, not the variable called text.
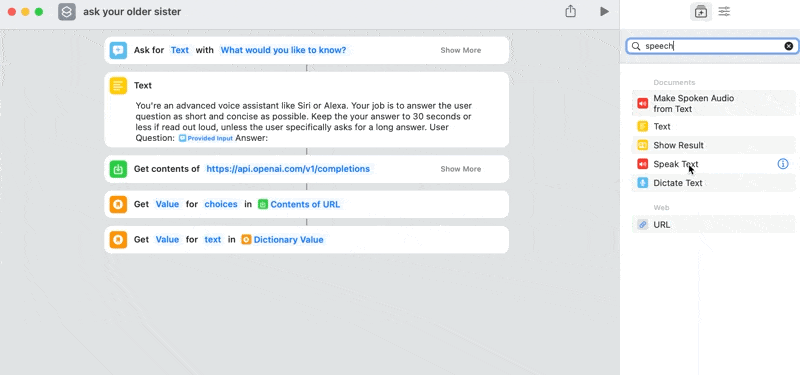
Your full setup should look like this:

Step 7: Turn OpenAI Answer into Siri response
Nearly done – all that’s left to replace Siri with OpenAI is to turn the text from the response into a spoken answer.
To do so, search for Speak text and add it as the last module to your shortcut.

And that’s it! Now you’ve successfully integrated OpenAI and Siri and upgraded your iPhone to have a smart AI Voice Assistant.
Simply say “Hey Siri” followed by the name of your shortcut. Wait for Siri to ask you “What would you like to know?” and ask your question. Then, after a short delay, Siri will give you an actual answer instead of the annoying “I found this on the web” response.


