A steady and reliable internet connection is crucial for completing tasks efficiently. But what happens when you encounter Wi-Fi issues on your Windows 10 device? Don’t worry, we’ve got you covered! In this post, we’ll share various troubleshooting methods to help you resolve these connectivity concerns.
How to fix Wi-Fi Problems in Windows 10
– Wi-Fi is connected but no Internet
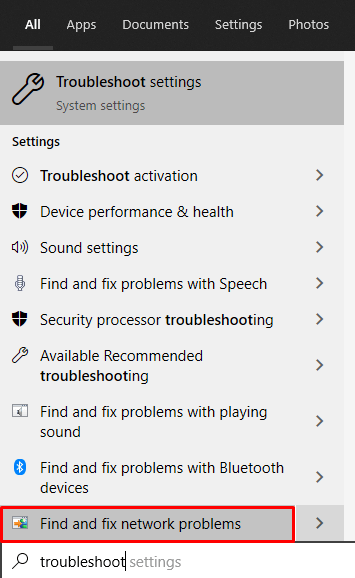
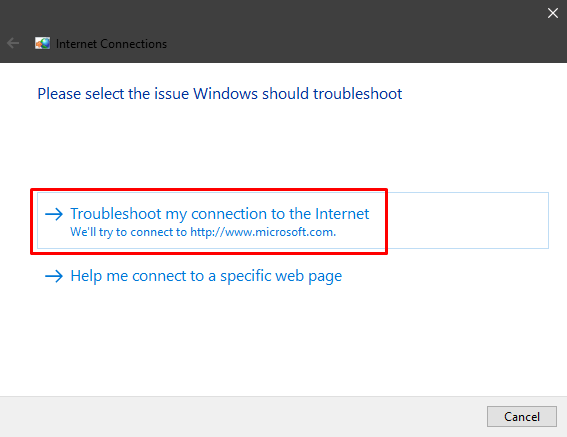
Have you ever been prompted with a message saying that you are connected to a Wi-Fi network, but yet you’re still unable to access the internet? If so, don’t worry! There may be a quick solution. Start by trying out your device’s native troubleshooting tool. This should detect any errors in your network settings and can often resolve the issue with minimal effort required. If this fails, then contact your internet provider for further assistance.
- At the bottom left corner, click on the Windows button and go to Settings.
- Now, click on ‘Update and Security’ and go to ‘Troubleshoot’.

- Now, click on ‘Internet Connections’ and tap ‘Run the troubleshooter’.

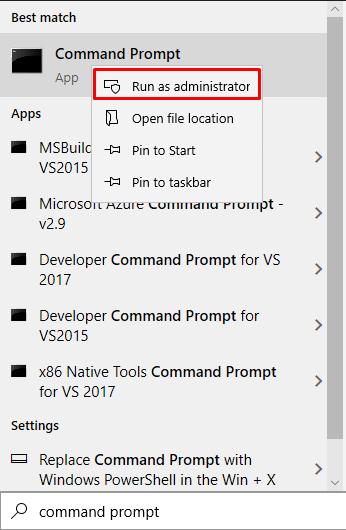
In any case this 3 solutions won’t work then open the command prompt and enter the following commands.

- netsh int ip reset
- ipconfig /renew
- ipconfig /flushdns
- netsh winsock reset
Windows 10 cannot find a Wi-Fi network
Before considering alternate solutions, it may be helpful to ask yourself two main questions. First, consider if you’re within range of the router. Additionally, make sure the router is turned on. If you have satisfactorily answered these inquiries and are still struggling to stay connected, there’s hope yet! There are a variety of different troubleshooting tips and tricks available. So don’t get discouraged; we can help you find the wifi connection so that you can continue using your device with ease!
Reboot the router
- Turn off your Wi-Fi router and unplug it from the power source.
- Wait for a minute and then connect it again.
- Switch on the router and try to connect your device.
Disable and enable your NIC
- Press Windows + R and type ‘ncpa.cpl’ and press enter.
- Right click on the wireless adapter and then click on ‘Disable’.
- Now, right click on the wireless adapter and then click on ‘Enable’.
- Restart your PC and try to connect to the Wi-Fi network.
Update network adapter driver
- Press Windows + R and type ‘devmgmt.msc’ and press enter.
- Click on ‘Network Adapters’ and then right click on ‘Wi-Fi Controller’.
- Now, select ‘Update drivers’.
- Now, click on ‘Search automatically for updated driver software’.
- Once the drivers are installed, reboot the system.
Windows 10 can’t connect to Wi-Fi
- Press Windows + X and click on ‘Device Manager’.
- Now, right click on network adapter and choose ‘Uninstall’.
- Click on ‘Delete the driver software for this device’.
- Reboot the system and Windows will automatically reinstall the drivers.
Wi-Fi does not have a valid IP configuration
- Connect your router using an ethernet cable.
- Enter the router’s IP address in the browser.
- Log into the device’s portal and change the network’s name and password.
Find Wi-Fi password in Windows 10
Quickly Retrieve Your Wi-Fi Password with These Easy Steps.
- At the bottom right corner, click on the Network icon in the taskbar.
- Now, click on ‘Network and Internet settings’.
- Now, click on ‘Change adapter options’.
- Right click on your Wi-Fi connection and then select ‘Status’.
- Now, click on ‘Wireless properties’ and then go the ‘Security’ tab.
- Mark the checkbox next to show characters to view the Wi-Fi password.

